Nexgrill Instruction Manual: A Comprehensive Guide
Welcome! This guide, sourced from the Internet Archive as of 04/22/2026, provides detailed instructions for your Nexgrill gas grill. Downloadable manuals are available in PDF, JP2, and TORRENT formats.
Uploaded by chris85 on August 10, 2020, this resource ensures safe and efficient operation of your grilling appliance.
Understanding Your Nexgrill Grill Model
Identifying Your Grill is Key: Before diving into operation, accurately identify your specific Nexgrill model. Nexgrill offers a diverse range of grills, each with unique features and burner configurations. Refer to the model and serial number typically located on a metal plate affixed to the grill’s body – often near the control panel or underneath the main cooking box.
Manual Access: The Internet Archive provides access to numerous Nexgrill gas grill user manuals. These resources, uploaded as early as August 10, 2020 (as of 04/22/2026), are available in various formats including PDF, JP2, and TORRENT downloads. Locating the manual specifically for your model is crucial.
Feature Overview: Familiarize yourself with the grill’s core components. This includes the burners, cooking grates, heat plates (flavorizer bars), ignition system, control knobs, and any additional features like side burners or warming racks. Understanding these elements will greatly enhance your grilling experience and ensure proper maintenance. Knowing your grill’s BTU rating is also important for temperature control.
Safety First: Always prioritize safety. The manual details critical safety precautions and warnings specific to your model. Review these thoroughly before first use.
Safety Precautions & Warnings
Crucial Safety Information: Your Nexgrill gas grill presents potential hazards if not operated correctly. Always consult your specific model’s manual – available for download from resources like the Internet Archive (updated as of 04/22/2026, with uploads dating back to August 10, 2020) – for detailed safety guidelines.
Gas Leak Prevention: Regularly check all gas connections for leaks using a soapy water solution. Never use a flame! If a leak is detected, immediately shut off the gas supply and contact a qualified technician.
Outdoor Use Only: Nexgrill grills are designed for outdoor use only. Never operate the grill indoors, in garages, or in enclosed areas. Ensure adequate ventilation.
Flammable Materials: Keep flammable materials (liquids, paper, etc.) well away from the grill during operation. Maintain a clear safety zone around the appliance.
Hot Surfaces: Grill surfaces become extremely hot during use. Avoid touching hot components and always use appropriate grilling tools. Supervise children and pets closely.
Proper Ventilation: Ensure the grill’s ventilation openings are never blocked. Blockage can lead to dangerous gas buildup.
Parts Identification – Exterior
Exterior Component Overview: Familiarizing yourself with the exterior parts of your Nexgrill is the first step to safe and effective grilling. Refer to downloadable manuals (available via the Internet Archive, last updated 04/22/2026, with initial uploads from August 10, 2020) for detailed diagrams specific to your model.
Key Exterior Features: Typically, you’ll find a durable lid with a heat-resistant handle, a side shelf for convenient tool storage, and a control panel housing the burner control knobs. The grill body itself is usually constructed from coated steel.
Additional Exterior Elements: Many Nexgrill models include a side burner for saucepans or side dishes, a warming rack for keeping food at temperature, and a bottom shelf for propane tank storage. Look for a grease tray and grease cup for easy cleanup.
Wheels & Casters: Most grills feature wheels or casters for portability. Ensure these are securely attached and functioning correctly. Inspect for rust or damage before each use.
Locate all parts on your grill and compare them to the diagrams in your manual to ensure proper assembly and understanding of functionality.
Parts Identification – Interior & Burners
Internal Component Overview: Understanding the interior components of your Nexgrill, as detailed in manuals available on the Internet Archive (accessed 04/22/2026, uploads beginning August 10, 2020), is crucial for maintenance and troubleshooting. Begin by identifying the cooking grates – typically porcelain-coated cast iron.
Burner System: The burners themselves are the heart of the grill, responsible for generating heat. Locate the burner tubes and the burner covers (also known as flavorizer bars) which distribute heat evenly and vaporize drippings.
Ignition System: Identify the igniter – either electronic or manual – and its corresponding wiring. Note the location of the gas valve, which controls the flow of propane to the burners.
Heat Distribution: Observe the heat shields or heat plates positioned above the burners. These protect the burners and promote even heat distribution. Locate the firebox, the main cavity where cooking occurs.
Regular inspection of these internal parts, referencing your model’s specific manual, will ensure optimal performance and longevity of your Nexgrill.
Initial Setup & Assembly
Unboxing and Inventory: Upon receiving your Nexgrill (information sourced from the Internet Archive, accessed 04/22/2026, with uploads dating back to August 10, 2020), carefully unpack all components. Cross-reference the parts list in your manual to ensure everything is present.
Frame Assembly: Begin by assembling the grill’s frame, typically involving attaching legs and support structures using provided screws and bolts. Ensure all connections are secure and tightened appropriately.
Component Installation: Next, install the grease management system, including the grease tray and drip pan. Carefully position the burners and heat shields within the firebox, following the diagram in your manual.
Control Panel Attachment: Attach the control panel, ensuring the burner control knobs align correctly with the gas valves. Double-check all connections before proceeding.
Final Inspection: Before connecting to a propane tank, thoroughly inspect the assembled grill for any loose parts or potential hazards. A properly assembled grill is essential for safe and enjoyable cooking.
Connecting to a Propane Tank
Safety First: Before connecting a propane tank (based on resources available via the Internet Archive as of 04/22/2026, with initial uploads from August 10, 2020), ensure the grill burners are turned OFF and there are no open flames nearby. Work in a well-ventilated area.
Regulator Connection: Locate the propane tank connection point on your Nexgrill. Carefully attach the regulator to the propane tank valve, ensuring a snug and secure fit. Hand-tighten the connection – do not use tools.
Leak Test: After connecting, perform a leak test. Mix a solution of soapy water and apply it to the connection point. If bubbles appear, there’s a leak; immediately disconnect and re-tighten. Repeat until no leaks are detected.
Tank Placement: Position the propane tank securely, away from heat sources and direct sunlight. Ensure the tank is stable and won’t tip over during use.
Hose Inspection: Regularly inspect the propane hose for cracks, abrasions, or damage. Replace the hose if any issues are found to prevent gas leaks and ensure safe operation.
Lighting the Grill – Standard Procedure
Preparation is Key: Before attempting to light your Nexgrill (referencing information available on the Internet Archive as of 04/22/2026, initially uploaded August 10, 2020), ensure all burner control knobs are in the “OFF” position. Open the propane tank valve slowly and fully.

Main Burner Lighting: Locate the burner lighting port, typically near the control panel. Insert a long-handled lighter or match through the port and turn the desired burner control knob to the “HIGH” position simultaneously.
Observe the Flame: Visually confirm the burner has ignited. If it doesn’t light within 10 seconds, turn the control knob back to “OFF”, wait five minutes for gas to dissipate, and repeat the process.
Subsequent Burners: Once the first burner is lit, you can light additional burners by turning their respective control knobs to “HIGH”. Allow the grill to preheat for 10-15 minutes before cooking.
Safety Reminder: Never lean over the grill when lighting. If you smell gas, immediately turn off the propane tank and contact a qualified technician.
Lighting the Grill – Electronic Ignition Systems
Understanding Your System: Many Nexgrill models (information sourced from the Internet Archive, updated 04/22/2026, originally uploaded August 10, 2020) feature electronic ignition for convenient lighting. This system uses a battery-powered spark to ignite the gas.
Ignition Procedure: Ensure all burner control knobs are in the “OFF” position. Open the propane tank valve slowly. Press and hold the igniter button – this is usually a separate button or integrated into the control knob.
Simultaneous Action: While holding the igniter button, turn the desired burner control knob to the “HIGH” position. You should hear a clicking sound and see a spark. The burner should ignite almost immediately.
Troubleshooting: If the burner doesn’t light, check the battery in the igniter module. A weak battery is a common cause of ignition failure. Also, ensure the igniter wire is securely connected to the burner.
Multiple Burners: Repeat the process for each burner you wish to light. Remember to allow the grill to preheat fully before cooking. Always prioritize safety when operating your Nexgrill.
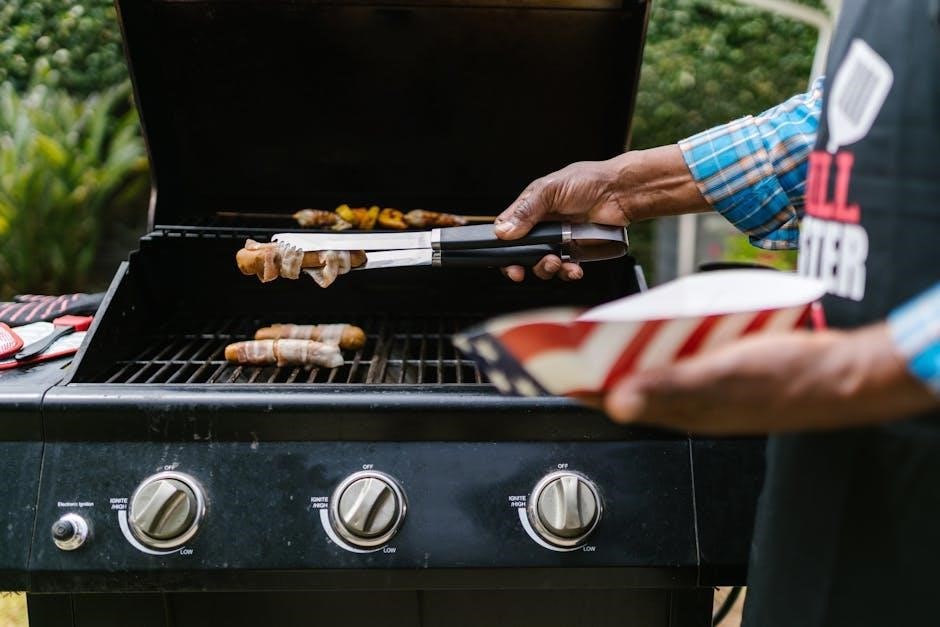
Adjusting Burner Control Knobs & Temperature
Precise Control: Nexgrill grills, as detailed in manuals available via the Internet Archive (data current as of 04/22/2026, originally uploaded August 10, 2020), offer precise temperature control through individual burner control knobs.
Knob Markings: These knobs typically feature markings indicating “OFF,” “LOW,” “MEDIUM,” and “HIGH.” Turning the knob clockwise increases the gas flow and, consequently, the burner’s heat output.
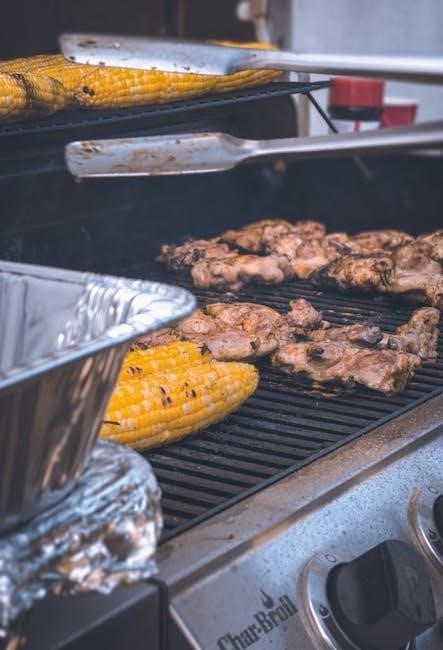
Temperature Regulation: For lower temperatures, use the “LOW” or “MEDIUM” settings. For searing or high-heat cooking, utilize the “HIGH” setting. Adjusting multiple burners allows for zoned cooking – creating areas of different temperatures.
Monitoring Temperature: Utilize the grill’s built-in thermometer (if equipped) to monitor the internal temperature. Experiment with knob settings to achieve your desired cooking temperature.
Gradual Adjustments: Make small, gradual adjustments to the knobs to avoid sudden temperature spikes. Remember that preheating time will vary depending on the ambient temperature and desired heat level.
Cleaning & Maintenance – Regular Tasks
Consistent upkeep, as outlined in Nexgrill manuals found on the Internet Archive (accessed 04/22/2026, uploaded August 10, 2020 by chris85), is crucial for grill longevity and performance. Regular tasks should be performed after each use.
Grill Grate Cleaning: After the grill has cooled completely, brush the grates thoroughly with a grill brush to remove food residue. This prevents flare-ups and ensures even cooking.
Drip Pan Management: Empty and clean the drip pan located beneath the grill. Accumulated grease is a fire hazard and attracts pests. Replace foil liners as needed.
Exterior Wipe-Down: Wipe down the exterior of the grill with a mild soap and water solution. Avoid abrasive cleaners that can damage the finish.
Burner Inspection: Visually inspect the burners for any blockages or damage. Ensure burner ports are clear for optimal gas flow. A clean grill is a safe and efficient grill!
Cleaning & Maintenance – Deep Cleaning
Periodic deep cleaning, referencing Nexgrill resources available via the Internet Archive (data accessed 04/22/2026, uploaded by chris85 on August 10, 2020), extends your grill’s lifespan and maintains peak performance. This should be done at least twice yearly.
Burner Removal & Cleaning: Carefully remove the burners (consult your model’s specific manual). Clean burner ports with a wire brush or pipe cleaner to eliminate obstructions. Inspect for corrosion.
Interior Component Scrubbing: Remove and scrub the interior components – flame tamers, heat plates – with a degreasing solution. Rinse thoroughly and allow to dry completely before reassembly.
Grease Trap & Burner Tube Cleaning: Thoroughly clean the grease trap and burner tubes, removing all accumulated grease and debris. This minimizes flare-ups and improves efficiency.
Exterior Polishing: For stainless steel models, use a stainless steel polish to restore shine and protect against rust. Remember safety first – disconnect the propane tank!
Troubleshooting Common Issues (Uneven Heating, Flare-Ups)
Uneven Heating: Referencing Nexgrill documentation (Internet Archive data from 04/22/2026, uploaded by chris85 on August 10, 2020), uneven heating often stems from blocked burner ports. Clean burners thoroughly as detailed in the deep cleaning section. Ensure proper propane tank pressure.
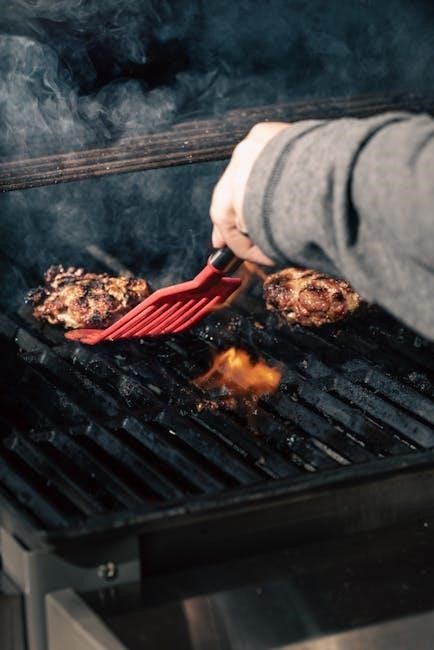
Flare-Ups: Excessive grease buildup is the primary cause of flare-ups. Regularly empty and clean the grease trap. Trim excess fat from meats before grilling. Lower the grill temperature if flare-ups persist;
Low Flame: A low flame can indicate a partially blocked burner, insufficient propane, or a faulty regulator. Check propane levels, clean burners, and inspect the regulator for damage.
Ignition Failure: If the igniter fails, ensure the electrode is clean and dry. Check the battery (if applicable). If problems continue, manually light the grill following the standard procedure.
Always prioritize safety! If issues persist after troubleshooting, consult a qualified technician or refer to the complete Nexgrill manual available online.
Replacing Grill Parts (Burners, Igniters)
Burner Replacement: According to Nexgrill resources (Internet Archive data, 04/22/2026, uploaded by chris85, August 10, 2020), always disconnect the propane tank before replacing burners. Carefully remove the old burner, noting its orientation. Install the new burner, ensuring it seats correctly and connects securely to the gas valve.

Igniter Replacement: Disconnect the wire from the old igniter. Remove the igniter from its mounting bracket. Install the new igniter, reconnecting the wire firmly. Test the igniter to confirm proper function before reconnecting the propane tank.
Important Safety Note: When replacing parts, use only genuine Nexgrill replacement parts to ensure compatibility and safety. Improperly installed parts can lead to gas leaks or malfunctions.
Detailed Instructions: Refer to the complete Nexgrill instruction manual (available via Internet Archive download – PDF, JP2, TORRENT formats) for specific diagrams and step-by-step instructions tailored to your grill model.
Professional Assistance: If you are uncomfortable performing these replacements, consult a qualified gas appliance technician.
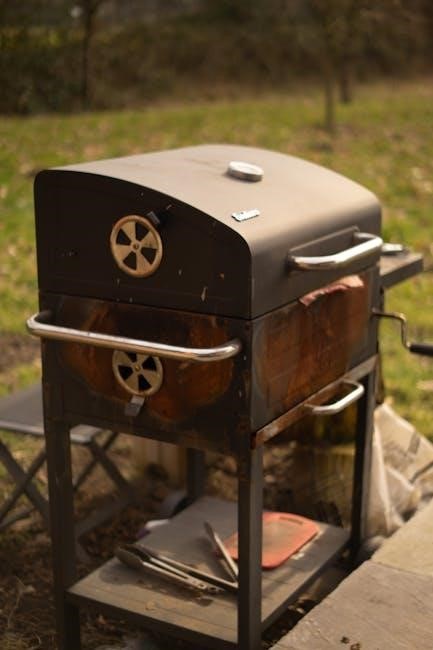
Storage & Winterization
Preparing for Storage: As per Nexgrill documentation (sourced from the Internet Archive, 04/22/2026, uploaded by chris85 on August 10, 2020), thoroughly clean your grill before long-term storage. Remove all ash and grease from the firebox and burners.
Propane Tank Disconnection: Completely disconnect the propane tank. Store the tank outdoors in a well-ventilated area, away from heat sources and direct sunlight. Never store a full propane tank inside a home or garage.
Grill Cover: Use a high-quality grill cover to protect your Nexgrill from the elements. Ensure the cover is securely fastened to prevent wind damage.
Long-Term Protection: Consider applying a rust preventative to metal surfaces for added protection during extended storage. Store the grill in a dry, sheltered location if possible.
Manual Reference: Download the complete Nexgrill manual (available in PDF, JP2, and TORRENT formats via the Internet Archive) for detailed winterization instructions specific to your model.
Nexgrill Warranty Information & Support
Warranty Details: Nexgrill offers a warranty on its grills, covering defects in materials and workmanship. Specific warranty terms vary by model; consult your original purchase documentation or the comprehensive manual (available as a PDF download from the Internet Archive, uploaded August 10, 2020, by chris85).
Registering Your Grill: Registering your Nexgrill grill online is highly recommended to expedite warranty claims. This process typically requires your model number and proof of purchase.
Customer Support: For assistance with warranty claims, parts replacement, or general inquiries, contact Nexgrill customer support. Details can be found within the downloadable manual and on the official Nexgrill website.
Online Resources: The Internet Archive (accessed 04/22/2026) provides access to numerous Nexgrill manuals and resources. Explore these materials for troubleshooting tips and frequently asked questions.
Parts Availability: Replacement parts are often available through Nexgrill’s website or authorized retailers. Ensure you have your model number when ordering parts.