Hoover Steamvac Dual V Manual: A Comprehensive Guide
Embark on a journey to pristine cleanliness! This detailed manual unlocks the full potential of your Hoover Steamvac Dual V, ensuring optimal performance and longevity.
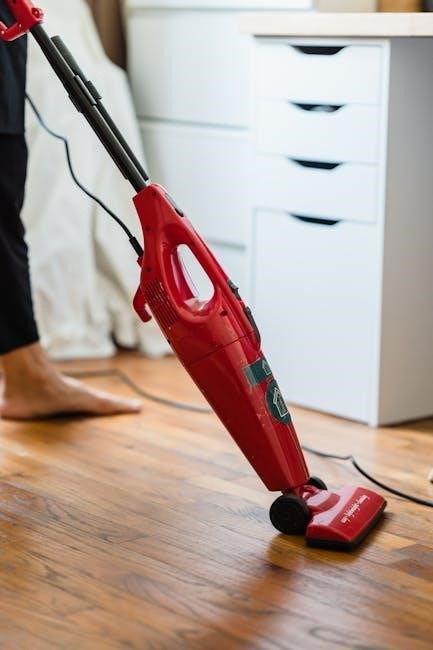
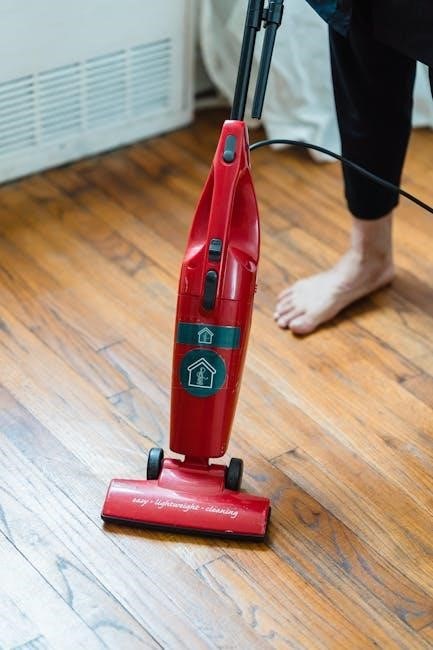
Welcome to a new era of deep cleaning! The Hoover Steamvac Dual V represents a significant advancement in home cleaning technology, combining powerful suction with innovative steam cleaning capabilities. This versatile machine is designed to tackle a wide range of surfaces, from carpets and rugs to hard floors and upholstery.
This manual serves as your comprehensive guide to understanding, operating, and maintaining your Steamvac Dual V. We’ll cover everything from initial setup and component identification to advanced cleaning techniques and troubleshooting common issues. Prepare to experience a cleaner, fresher home with the power of steam and the reliability of Hoover!
Understanding the Key Features
The Hoover Steamvac Dual V boasts several features designed for superior cleaning. Its Dual V Technology utilizes two rotating brushrolls to powerfully agitate and lift dirt from deep within carpet fibers. Integrated steam control allows you to customize the steam level based on the surface being cleaned, ensuring optimal results without damage.
Furthermore, the unit features a heated cleaning solution tank for enhanced cleaning power and a quick-drying function to minimize downtime. The lightweight design and swivel steering contribute to effortless maneuverability, while the included attachments expand its versatility for tackling various cleaning tasks throughout your home.

Setting Up Your Hoover Steamvac Dual V
Prepare for a deep clean! This section guides you through the initial setup process, from unboxing to filling the water reservoir, with ease.
Unboxing and Component Identification
Welcome to the first step! Carefully unpack your Hoover Steamvac Dual V, ensuring all components are present. You should find the main unit, the handle assembly, the power cord, a sample of cleaning solution, and various attachments. Important: Retain the original packaging for potential returns or warranty claims.
Identify the key parts: the clean water tank, the dirty water tank, the brush roll, the solution trigger, and the steam control dial. Refer to the included quick-start guide for a visual diagram. Inspect each component for any shipping damage before proceeding. Familiarizing yourself with these parts now will simplify assembly and operation later on, maximizing your cleaning experience.
Assembling the Unit – Step-by-Step
Let’s get it built! Begin by attaching the handle to the main unit, aligning the connector until it clicks securely into place. Ensure a firm connection for optimal control during cleaning. Next, connect the power cord to the designated port on the back of the machine. Caution: Do not plug the cord into an outlet yet!
Attach any desired attachments, such as the crevice tool or upholstery brush, to the hose. Double-check all connections to prevent detachment during use. A properly assembled unit is crucial for safe and effective operation. Refer to the diagram in the manual if needed, ensuring each step is completed correctly.
Initial Setup and Water Reservoir Filling
Prepare for powerful cleaning! Before first use, flush the system by filling the clean water reservoir with warm (not hot) tap water and running the unit for a short period – consult the ‘Operating Instructions’ section. This removes any manufacturing residue.
To fill the reservoir, detach it from the unit and locate the fill cap. Add warm water to the ‘MAX’ fill line, avoiding overfilling. You can now add your preferred cleaning solution (see ‘Cleaning Solutions and Usage’). Reattach the reservoir securely, ensuring it clicks into place. Improper filling can affect performance.

Operating Instructions
Unlock cleaning power! This section details how to effectively use your Hoover Steamvac Dual V, from powering on to utilizing its advanced cleaning features.
Powering On and Selecting Cleaning Modes
Initiating Operation: Begin by connecting the Hoover Steamvac Dual V to a grounded electrical outlet. Press the power button, typically located on the handle or main unit, to activate the device. A power indicator light will illuminate, confirming activation.
Cleaning Mode Selection: The Dual V offers various cleaning modes tailored to different surfaces and soil levels. Utilize the mode selector dial or buttons to choose the appropriate setting. Options commonly include ‘Dry’, ‘Quick Clean’, ‘Deep Clean’, and ‘Rinse’.
Mode Indicators: Observe the corresponding indicator lights to verify your selected mode. For heavily soiled areas, ‘Deep Clean’ is recommended, while ‘Quick Clean’ suits lighter messes. Always refer to surface care guidelines before selecting a mode.
Using the Integrated Steam Control
Steam Level Adjustment: The Hoover Steamvac Dual V features integrated steam control, allowing you to customize steam output for optimal cleaning. Locate the steam control dial or buttons, usually positioned near the handle.
Variable Settings: Adjust the steam level based on the surface type and soil severity. Lower settings are ideal for delicate fabrics or sealed hard floors, preventing damage. Higher settings tackle stubborn stains and heavily soiled carpets.
Steam Trigger: Engage the steam trigger on the handle to release steam during cleaning. Release the trigger to halt steam flow. Monitor the steam output and adjust the control as needed for effective and safe cleaning.
Navigating the Dual V Technology
Dual V Power: The Hoover Steamvac Dual V’s core innovation lies in its Dual V Technology. This system utilizes two distinct suction channels – a primary and a secondary – to maximize dirt and water extraction.
Enhanced Suction: The primary channel provides powerful, direct suction, lifting embedded dirt and grime. Simultaneously, the secondary channel captures remaining moisture and debris, accelerating drying times.
Optimized Cleaning: This dual-action approach ensures a deeper, more thorough clean compared to traditional steam cleaners. Observe the clear viewing window to monitor the extraction process and confirm effective cleaning.
Cleaning Solutions and Usage
Unlock superior cleaning power! Discover the recommended solutions for your Steamvac Dual V, ensuring optimal results and preserving the unit’s performance.
Recommended Cleaning Solutions
Maximize your Steamvac’s effectiveness with the right solutions! Hoover recommends using their specifically formulated cleaning solutions designed for Steamvac carpet cleaners. These solutions are engineered to work harmoniously with the Dual V technology, delivering exceptional cleaning results while protecting the machine.
Avoid using excessive soap or detergents, as this can create buildup and potentially damage internal components. For general carpet cleaning, the Hoover SteamVac Carpet Cleaning Solution is ideal. For tougher stains and odors, consider the Hoover SteamVac Stain & Odor Remover. Always check the solution’s label to ensure compatibility with your Steamvac Dual V model.
Mixing and Loading Cleaning Solutions
Proper solution preparation is key to a spotless clean! Always refer to the cleaning solution’s label for precise mixing ratios. Typically, Hoover solutions require dilution with warm tap water. Carefully pour the recommended amount of solution into the clean water tank, then fill the remainder with warm water – avoid using hot water.
Once mixed, securely attach the clean water tank to your Steamvac Dual V. Ensure a snug fit to prevent leaks during operation. Never overfill the tank, and avoid using solutions not specifically designed for carpet cleaning machines, as these could cause damage or void your warranty.
Solution Tank Capacity and Refilling
Understanding your Steamvac’s tank capacity ensures uninterrupted cleaning! The Hoover Steamvac Dual V features separate tanks for clean and dirty water, each with a generous capacity of 1.5 quarts. Regularly monitor the clean water tank level during use, especially during larger cleaning jobs.
Refilling is simple: detach the tank, remove the cap, and add fresh cleaning solution (properly mixed, as detailed previously). Securely reattach the cap and the tank to the unit. The dirty water tank will fill as you clean; empty it frequently to maintain optimal suction and prevent re-soiling.

Maintenance and Troubleshooting
Keep your Steamvac performing flawlessly! This section details essential upkeep procedures and solutions to common issues, maximizing your cleaning experience and machine lifespan.
Filter Cleaning and Replacement
Maintaining a clean filter is crucial for optimal suction and performance of your Hoover Steamvac Dual V. Regularly inspect the filter for dust and debris accumulation – typically after each use or every few cleaning sessions. A clogged filter significantly reduces cleaning effectiveness and can strain the motor.
To clean, remove the filter (refer to the parts diagram for location) and gently rinse it under cool water. Allow it to air dry completely – at least 24 hours – before reinstalling. Never use soap or detergents.
Filters require periodic replacement. The frequency depends on usage, but generally, replace the filter every 6-12 months. A worn or damaged filter should be replaced immediately to prevent dust recirculation and maintain peak performance. Replacement filters are readily available.
Brush Roll Maintenance
The brush roll is vital for agitating and lifting dirt from surfaces with your Hoover Steamvac Dual V. Regularly inspect the brush roll for tangled hair, threads, or debris. These obstructions reduce cleaning efficiency and can damage the motor.
To clean, disconnect the unit from power and remove the brush roll (consult the parts diagram). Carefully cut away any tangled materials using scissors or a seam ripper. Avoid damaging the bristles.
Periodically, check the brush roll bristles for wear. If bristles are bent, broken, or excessively worn, replace the brush roll to maintain optimal cleaning performance. A new brush roll ensures effective agitation and a thorough clean.
Nozzle and Hose Cleaning
Maintaining a clear nozzle and hose is crucial for consistent suction and steam delivery with your Hoover Steamvac Dual V. After each use, inspect the nozzle for clogs caused by debris or dried cleaning solution.
Detach the hose and visually inspect it for blockages. Flush the hose with warm water to remove any lingering residue. Ensure the water is completely drained before reattaching. For stubborn clogs, use a long, flexible brush or tool.
Regularly wipe down the nozzle exterior with a damp cloth. A clean nozzle and hose guarantee optimal performance and prevent unpleasant odors.

Advanced Features & Techniques
Unlock expert cleaning power! Discover specialized techniques for spot treatments, upholstery revitalization, and tackling stairs with your Hoover Steamvac Dual V.
Spot Cleaning with the Hoover Steamvac Dual V
Targeted stain removal is now effortless! The Hoover Steamvac Dual V excels at spot cleaning, offering a concentrated burst of steam and suction for immediate results. Begin by attaching the appropriate nozzle – the crevice tool is ideal for tight spaces, while the brush attachment gently loosens debris.
Pre-treat stubborn stains with a compatible cleaning solution, allowing it to dwell for a few minutes. Select the ‘Spot Clean’ mode, if available, or utilize the lowest heat setting to prevent damage to delicate fabrics. Slowly glide the nozzle over the affected area, overlapping each pass for thorough coverage.
Avoid excessive saturation; the Steamvac’s power lies in its steam, not flooding. After cleaning, use a clean, dry cloth to blot away any remaining moisture. Repeat if necessary for persistent stains.
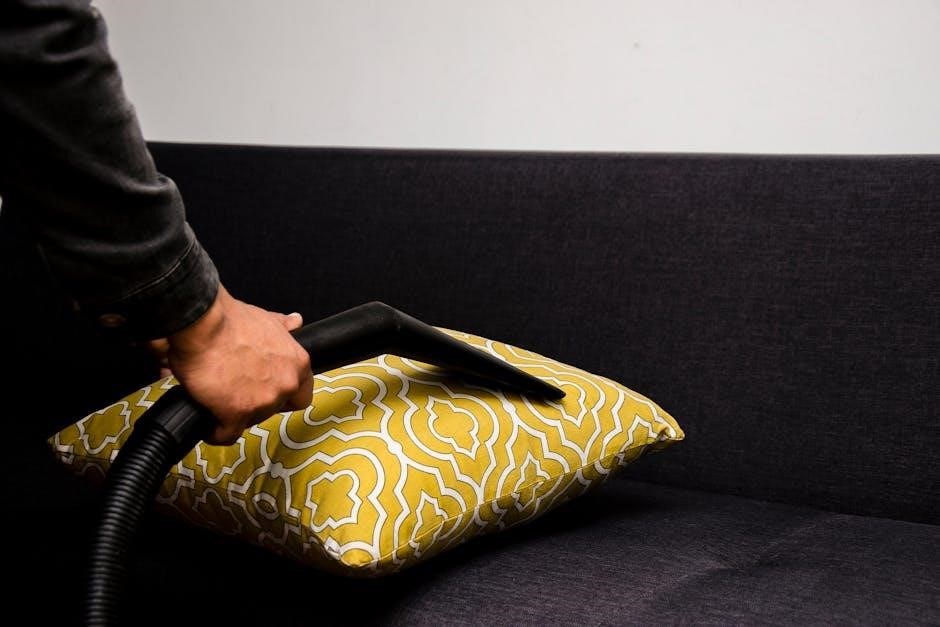
Upholstery Cleaning Guide
Revitalize your furniture with the Hoover Steamvac Dual V! Before cleaning, always test a hidden area to ensure fabric compatibility. Attach the upholstery tool and select a low heat setting, especially for delicate materials like silk or velvet.
Lightly mist the upholstery with a Hoover-approved cleaning solution, avoiding oversaturation. Employ slow, overlapping strokes, maintaining consistent pressure. The Steamvac’s suction will lift dirt and grime, leaving your upholstery refreshed.
For cushions, clean both sides thoroughly. Allow the upholstery to air dry completely before use, ensuring proper ventilation. Regular upholstery cleaning extends the life of your furniture and maintains a healthy home environment.
Stair Cleaning Techniques
Conquer stair grime with the Hoover Steamvac Dual V! Utilize the hose and appropriate attachment for optimal reach and maneuverability. Begin at the top step and work downwards to prevent re-soiling. Select a lower heat setting for delicate carpet fibers or rugs.
Apply a Hoover-approved cleaning solution sparingly, focusing on high-traffic areas. Employ slow, deliberate strokes, ensuring thorough cleaning along edges and corners. The powerful suction will extract embedded dirt and allergens.
Allow each step to air dry completely before proceeding to the next, ensuring safety and preventing slips. Regular stair cleaning maintains a safe and hygienic home environment.
Safety Precautions
Prioritize safety during operation! Always unplug the unit when not in use, avoid directing steam at people, and heed all electrical guidelines.
Electrical Safety Guidelines
To ensure safe operation and prevent potential hazards, carefully review these electrical safety guidelines. Always verify the voltage indicated on the appliance matches your household supply. Never operate the Hoover Steamvac Dual V with a damaged cord or plug; immediate replacement is crucial.
Avoid using extension cords whenever possible; if necessary, ensure it’s a heavy-duty cord rated for the appliance’s wattage. Do not immerse the unit, cord, or plug in water or other liquids. Unplug from the outlet when not in use and before performing any maintenance.
Never pull the cord to disconnect from the outlet – grasp the plug instead. Keep the cord away from heated surfaces and sharp edges. If the appliance malfunctions or shows signs of electrical damage, discontinue use immediately and contact Hoover customer support.
Safe Handling of Hot Steam
Exercise extreme caution when operating the Hoover Steamvac Dual V, as it produces hot steam that can cause burns. Never direct the steam nozzle towards yourself, others, or pets. Maintain a safe distance during operation, and avoid touching the nozzle or steam path.
Allow the unit to cool down completely before storing or performing maintenance. Be mindful of surrounding surfaces, as hot steam can damage sensitive materials.
Wear appropriate footwear to protect your feet from accidental steam exposure. Supervise children and ensure they remain a safe distance from the appliance during use. If accidental steam burns occur, immediately flush the affected area with cool water and seek medical attention.
Preventing Damage to Surfaces
Protect your valuable floors and upholstery! Before using the Hoover Steamvac Dual V, always test a small, inconspicuous area to ensure compatibility. Avoid prolonged exposure to delicate surfaces like silk or wool, as excessive heat can cause damage.
Use the appropriate attachments and cleaning solutions recommended for each surface type. Do not use the unit on unsealed hardwood floors or surfaces sensitive to moisture.
Be cautious when cleaning around furniture legs or edges, preventing potential scratching or discoloration. Regularly inspect the brush roll for debris that could cause surface abrasion. Proper preparation and careful operation are key to preserving your home’s beauty.
Troubleshooting Common Issues
Resolve operational hiccups swiftly! This section provides solutions for frequent problems like power failures, steam inconsistencies, and brush roll malfunctions, ensuring seamless cleaning.
Unit Not Powering On
Diagnosing a lack of power requires a systematic approach. First, verify the power cord is securely plugged into a functioning electrical outlet. Test the outlet with another device to confirm it’s delivering power. Inspect the power cord itself for any visible damage, such as cuts or fraying – do not use if damaged.
Next, check the circuit breaker or fuse box to ensure the circuit hasn’t tripped or the fuse hasn’t blown. Reset the breaker or replace the fuse if necessary. Confirm the unit’s on/off switch is firmly in the ‘on’ position. If the issue persists, consult the warranty information or contact Hoover customer support for further assistance, as internal components may require professional evaluation.
Steam Output Problems
Insufficient steam can hinder effective cleaning. Begin by ensuring the water reservoir is adequately filled with clean water – a low water level is a common cause. Verify the steam control settings are appropriately adjusted for the desired cleaning intensity. Check for any blockages within the nozzle or hose; mineral buildup can restrict steam flow.
Run a descaling cycle (refer to the maintenance section) to remove potential mineral deposits. Confirm the unit has reached operating temperature, as steam generation requires sufficient heat. If problems continue, inspect the steam valve for proper function and contact Hoover support if needed.
Brush Roll Not Rotating
A non-rotating brush roll significantly reduces cleaning effectiveness. First, power off and unplug the unit for safety. Inspect the brush roll for tangled debris – hair, fibers, or strings can obstruct its movement. Carefully remove any obstructions using scissors or a seam ripper, being cautious not to damage the bristles.
Check the brush roll motor for any visible damage or loose connections. Ensure the belt connecting the motor to the brush roll is intact and properly positioned. If the belt is broken, it requires replacement. If issues persist, consult the parts diagram or contact Hoover customer support for assistance.

Parts Diagram and Replacement
Locate essential components with ease! This section provides a detailed diagram and guidance for identifying and replacing worn or damaged parts efficiently.
Identifying Key Replacement Parts
Understanding your Hoover Steamvac Dual V’s components is crucial for effective maintenance. Key parts requiring occasional replacement include the brush roll, filters (both pre-motor and HEPA), the nozzle assembly, and the solution tank. The hose, often subject to wear and tear, is another common replacement item.
Refer to the detailed parts diagram for precise identification. Each part is labeled with a corresponding number, cross-referenced in the parts list. Pay close attention to the specific model number of your Steamvac Dual V, as parts may vary between versions. Regularly inspecting these components allows for proactive replacement, preventing performance decline and extending the lifespan of your cleaning machine.
Where to Purchase Replacement Parts
Maintaining your Hoover Steamvac Dual V is easy with readily available replacement parts. Authorized Hoover retailers, both online and brick-and-mortar stores, are excellent sources. The official Hoover website (hoover.com) offers a comprehensive selection and ensures genuine parts.
Additionally, major online marketplaces like Amazon and eBay frequently stock Hoover Steamvac Dual V parts. When purchasing from third-party sellers, verify the seller’s reputation and ensure the part’s compatibility with your specific model number. Local appliance repair shops may also carry common replacement parts. Always compare prices and shipping costs before making a purchase.
Understanding the Parts List
The Hoover Steamvac Dual V parts list is your key to successful maintenance and repair. It meticulously details every component, from the brush roll and nozzle to the solution tanks and hoses. Each part is assigned a unique number for easy identification when ordering replacements.
The list typically includes exploded diagrams illustrating how parts fit together, aiding in assembly and disassembly. Pay close attention to part numbers and descriptions to ensure you select the correct replacement. Refer to the manual’s diagrams alongside the parts list for visual clarity. Understanding this list empowers you to confidently address any maintenance needs.
Warranty Information
Protect your investment! This section details the Hoover Steamvac Dual V’s warranty coverage, claim procedures, and essential customer support contact information.
Warranty Coverage Details
Your Hoover Steamvac Dual V is covered against defects in materials and workmanship for a period of one year from the date of original purchase. This warranty encompasses all manufacturing flaws affecting the unit’s operation under normal household use. It does not cover damage resulting from misuse, abuse, commercial application, unauthorized repairs, or normal wear and tear.
Specifically, the warranty addresses issues with the motor, heating element, and structural components. Accessories like cleaning solutions and brushes are typically excluded. Proof of purchase is mandatory for all warranty claims. Modifications to the device void the warranty immediately. Retain your original receipt to streamline any potential service requests.
How to Claim Warranty Service
To initiate a warranty claim for your Hoover Steamvac Dual V, first gather your original purchase receipt as proof of date and location. Contact Hoover Customer Support via phone or their website – details are provided in the ‘Contacting Hoover Customer Support’ section. Be prepared to describe the defect clearly and concisely.
A representative will guide you through the process, potentially requesting photos or videos of the issue. If a repair is approved, you may be asked to ship the unit to an authorized service center, with shipping costs potentially covered under the warranty. Alternatively, a replacement unit might be offered.
Contacting Hoover Customer Support
For dedicated assistance with your Hoover Steamvac Dual V, Hoover offers multiple convenient contact methods. You can reach their customer support team by phone at 1-800-747-5534, available during standard business hours, Monday through Friday. Alternatively, visit the official Hoover website at Hoover.com and navigate to the ‘Support’ or ‘Contact Us’ section.
Here, you’ll find a comprehensive FAQ section, live chat options, and a form to submit inquiries directly. Ensure you have your model number and purchase date readily available for quicker service. Social media channels may also offer support, though response times can vary.