Safety Precautions
1․1 General Safety Guidelines
- Ensure the installation area is clear of combustible substances and debris․
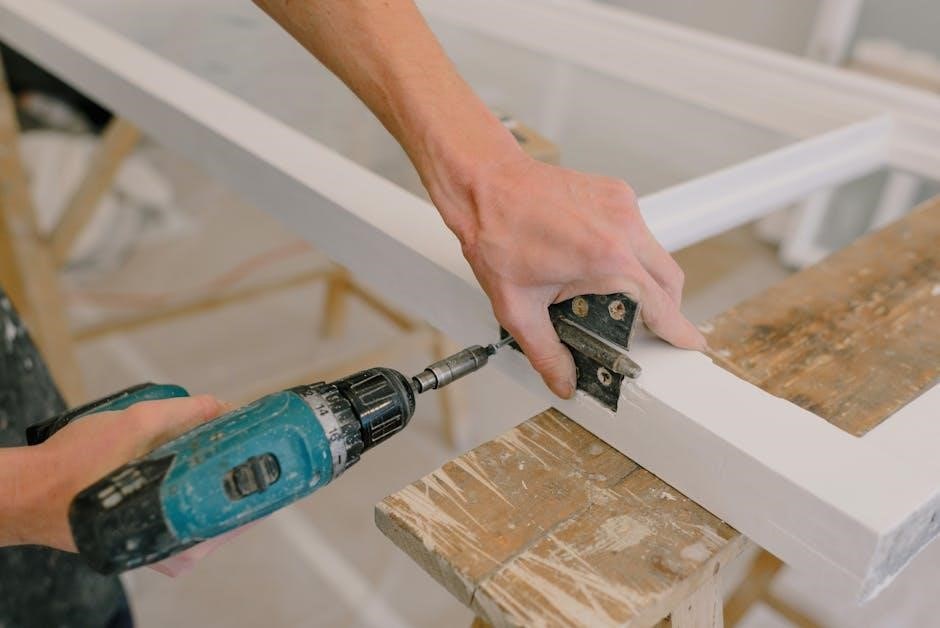
- Use appropriate tools and equipment to avoid accidents during installation․
- Follow all local and national safety codes and regulations strictly․
- Be cautious of sharp edges and hot surfaces during handling․
Before starting the installation of the Goodman GM9S96 gas furnace‚ ensure the power supply is disconnected to prevent electrical shocks․ Always wear protective gear‚ including gloves and safety glasses‚ to minimize injury risks․ Follow all local‚ state‚ and national safety codes‚ as well as the guidelines outlined in this manual․ Properly ground the furnace to avoid electrical hazards․ Ensure the installation area is well-ventilated and free from flammable materials․ Never attempt to install or service the furnace without proper training‚ as this could result in personal injury‚ property damage‚ or equipment malfunction․ Familiarize yourself with all safety warnings and precautions detailed in this manual before proceeding․ Improper installation can lead to serious safety hazards‚ including gas leaks or carbon monoxide poisoning․ Always adhere to the manufacturer’s instructions to ensure safe and correct installation․
1․2 Handling Precautions
When handling the Goodman GM9S96 gas furnace‚ ensure the unit is properly supported to avoid damage․ Use mechanical lifters or dollies for moving heavy components‚ as improper lifting may cause personal injury or equipment damage․ Avoid touching electrical components or controls with wet hands to prevent electrical shock․ Protect the furnace from exposure to moisture‚ as this can lead to corrosion or malfunction․ Always secure the furnace during transportation to prevent shifting or impact damage․ Handle gas and electrical connections with care‚ as improper handling may result in leaks or fires․ Keep the furnace away from open flames or sparks during installation․ Avoid exposing the unit to extreme temperatures or harsh environmental conditions before installation․ Follow all manufacturer guidelines for handling and storage to ensure the furnace remains in optimal condition for installation․

Installation Requirements
Ensure proper site preparation‚ including clearances and ventilation‚ before installing the Goodman GM9S96 furnace․ Verify electrical and gas connections meet local codes and specifications․ Follow all safety guidelines and manufacturer recommendations for a successful installation․
2․1 Site Preparation
Proper site preparation is essential for a safe and efficient installation of the Goodman GM9S96 furnace․ Ensure the installation area is clean‚ dry‚ and free from combustible materials․ Verify that the location complies with local building codes and regulations․ Check for adequate drainage to prevent water damage․ Level the surface where the furnace will be mounted to ensure stable operation․ Ensure proper clearance around the furnace for ventilation and service access․ Refer to the manual for specific dimensional requirements․ Familiarize yourself with local installation guidelines and ASHRAE standards for heat loss calculations․ Prepare the necessary tools and materials as outlined in the manual to streamline the installation process․ Always follow safety protocols during site preparation to avoid accidents․
2․2 Venting Requirements
Proper venting is critical for safe and efficient operation of the Goodman GM9S96 furnace․ Use vent pipes made of PVC with a minimum diameter of 2 inches‚ increasing to 3 inches if required by local codes or installation specifics; Ensure the venting system is properly sealed to prevent gas leaks․ The vent pipe must be sloped correctly to avoid condensate accumulation․ Refer to the manual for detailed venting configurations‚ including the maximum number of elbows and total vent length; Always comply with local building codes and regulations for venting installations․ Proper venting ensures safe combustion air intake and exhaust removal‚ preventing potential hazards like carbon monoxide buildup․
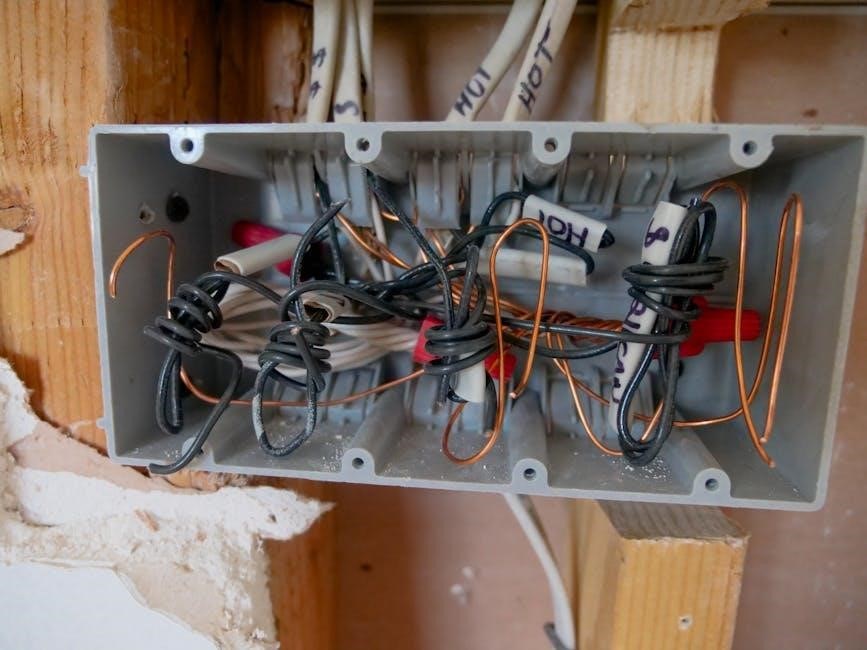
2․3 Electrical and Gas Connections
Ensure all electrical and gas connections comply with local codes and regulations․ The furnace requires a dedicated 120-volt circuit with proper polarity and grounding․ Minimum circuit ampacity must be calculated as 1․25 times the blower amps․ Use approved flexible gas tubing or Schedule 40 PVC pipe for gas connections․ Ensure all connections are tight to prevent gas leaks․ Refer to the manual for specific wiring diagrams and connection details․ Properly secure all electrical wires and connections to avoid vibration or damage․ Always test electrical and gas connections after installation to ensure safety and efficiency․ Use a qualified technician for gas line installation to adhere to safety standards․

Installation Steps
Begin with site preparation‚ then mount the furnace securely․ Connect gas and electrical systems according to specifications‚ followed by configuring the combustion air system for optimal performance․
3․1 Mounting the Furnace
Ensure the furnace is mounted on a level‚ stable surface to maintain proper operation․ Use the pre-drilled mounting holes to secure the unit with appropriate hardware․ Align the furnace carefully to ensure it is plumb and level․ Avoid over-tightening screws to prevent damage to the chassis․ If installing horizontally‚ refer to the manual for specific leveling considerations․ Always use a spirit level to verify accuracy․ Ensure the area around the furnace is clear of obstructions for proper airflow and maintenance access․ Install a gasket or sealant around the mounting points if required to prevent air leaks․ Follow the manufacturer’s guidelines for weight distribution to avoid structural damage․ Proper mounting is critical for safety‚ efficiency‚ and longevity of the unit․
3․2 Connecting Gas and Electrical Systems
Connect the gas line to the furnace using approved tubing or pipe‚ ensuring proper sizing and secure connections․ Use a gas manifold gauge to verify pressure settings match the furnace’s requirements․ For electrical connections‚ ensure the circuit matches the furnace’s ampacity and voltage ratings․ Wire the unit according to the wiring diagram provided in the manual‚ ensuring proper polarization and grounding․ Install a dedicated 120V circuit with a properly rated circuit breaker․ Test all connections for leaks using a soap solution or leak detector․ Ensure the electrical supply is disconnected before servicing․ Follow local electrical codes and safety standards to prevent hazards․ Proper connections are critical for safe and efficient operation of the furnace․
3․3 Configuring the Combustion Air System
To configure the combustion air system‚ ensure proper ventilation for safe operation․ Use a combustion air pipe of 2 or 3 inches in diameter‚ as specified in the manual‚ to maintain adequate airflow․ Install the pipe according to local building codes and the furnace’s requirements․ Ensure the system is sealed tightly to prevent air leaks․ Refer to the manual for specific venting configurations‚ especially for horizontal applications․ Proper combustion air setup is critical to prevent carbon monoxide buildup and ensure efficient furnace performance․ Test the system after installation to confirm airflow meets specifications․ Always follow the manufacturer’s guidelines to avoid potential hazards and ensure compliance with safety standards․

Testing and Commissioning

After installation‚ perform initial startup procedures to ensure proper furnace operation․ Check gas flow‚ ignition‚ and venting systems․ Verify all electrical connections and controls are functioning correctly․
4․1 Initial Startup Procedures
Start by ensuring all electrical and gas connections are secure and properly configured․ Turn on the power supply and set the thermostat to a high temperature to activate the furnace․ Verify ignition by checking the burner flames․ Monitor the system for proper operation‚ including airflow and venting․ Use the control panel to adjust settings as needed․ Check for any unusual noises or odors․ If issues arise‚ refer to the troubleshooting guide․ Ensure the combustion air system is functioning correctly․ Document any observations for future reference․ Always follow the manufacturer’s instructions for a safe and efficient startup process․
4․2 System Performance Verification
After initial startup‚ verify the system’s performance by checking temperature rise‚ airflow‚ and venting efficiency․ Ensure the combustion air system is functioning correctly and monitor the control panel for any error codes․ Verify proper burner operation and ignition sequence․ Check for gas leaks using a soap solution or leak detector․ Measure the system’s electrical consumption and compare it with the specified ratings․ Ensure the heat exchanger is functioning properly and free from blockages․ Refer to the airflow tables in the manual to confirm proper airflow settings․ Verify that all safety devices are operational and that the system meets the required efficiency standards․ Document all findings for future reference and ensure the system operates within the specified parameters․
Maintenance and Troubleshooting
- Perform routine cleaning of filters and vents to ensure optimal airflow․
- Inspect gas connections for leaks and tighten if necessary․
- Check for error codes on the control panel and refer to the troubleshooting guide․
- Verify proper ignition and burner operation periodically․
- Address unusual noises or uneven heating by consulting the manual․
5․1 Routine Maintenance Tasks
Regular maintenance is essential to ensure the optimal performance and longevity of the Goodman GM9S96 furnace․ Start by inspecting and cleaning the air filters monthly to maintain proper airflow․ Check the venting system for blockages or damage‚ ensuring it is clear of debris․ Inspect the gas lines for leaks and tighten connections if necessary․ Verify the ignition system is functioning correctly and clean the burner compartments as needed․ Additionally‚ monitor the furnace’s control panel for error codes and address them promptly․ Schedule annual professional inspections to identify and resolve potential issues before they escalate․ Proper maintenance not only enhances efficiency but also ensures safe operation and extends the furnace’s lifespan․ Always refer to the manual for specific guidance on these tasks․
Issue: The furnace fails to ignite․ Issue: Unusual noises during operation․ Issue: Inconsistent heating or low air flow․ Issue: Error codes displayed on the control panel․ Addressing these issues promptly ensures reliable performance and prevents further complications․ The Goodman GM9S96 furnace is backed by a comprehensive warranty‚ ensuring parts and labor coverage for defects․ Dedicated customer support is available for inquiries and assistance․ The Goodman GM9S96 furnace comes with a comprehensive warranty program to protect your investment․ The standard warranty includes a 10-year limited parts warranty and a 5-year limited heat exchanger warranty․ Additionally‚ labor costs for repairs may be covered under a 1-year warranty when installed by a certified technician․ These warranties provide peace of mind and financial protection against defects in materials and workmanship․ To ensure full coverage‚ the unit must be installed according to the manufacturer’s instructions and local building codes․ Registration within 60 days of installation is required to maximize warranty benefits․ Proper maintenance and annual inspections are also essential to maintain warranty validity and ensure optimal performance of the furnace․ Always refer to the warranty documentation for specific terms and conditions․ For any inquiries‚ technical assistance‚ or warranty-related questions regarding the Goodman GM9S96 furnace‚ contact the Goodman support team․ Their customer service can be reached at 1-877-254-4729․ You can also visit their official website at www․goodmanmfg․com for detailed resources‚ including manuals‚ troubleshooting guides‚ and FAQs․ Additionally‚ you may contact your local authorized Goodman dealer for personalized support and service․ Ensure to have your unit’s model number and serial number ready for efficient assistance․ Goodman’s dedicated support team is available to address your concerns and provide expert solutions to ensure your furnace operates at peak performance․ Timely support helps maintain your system’s efficiency and longevity while resolving any operational issues promptly․5․2 Common Issues and Solutions
Solution: Check the gas supply and ensure the valve is open․ Verify that the igniter is clean and functioning properly; If issues persist‚ consult a professional․
Solution: Inspect for loose panels or debris near the furnace․ Lubricate moving parts if necessary․ Contact a technician if noises continue or worsen․
Solution: Ensure air filters are clean and replace them if dirty․ Check for blockages in vents or ducts․ Verify the thermostat settings are correct․
Solution: Refer to the manual for code meanings․ Perform troubleshooting steps outlined or contact a certified technician for assistance․
Warranty and Support
6․1 Warranty Coverage Details
6․2 Contact Information for Support